o
p
t
i
m
a
r
o
b
o
t
i
c
s

Make a Call


Make a Call
Blogs
How to Adjust Pop Up Sprinklers for Better Coverage?
A healthy lawn can still hide an irrigation problem. Dry crescents near sidewalks, muddy patches beside flowerbeds, and tilted spray heads reveal uneven watering. Adjusting Pop Up Sprinklers helps correct these patterns before wasted water becomes routine.
Irrigation specialist Robert N. Carrow offers a useful principle: “Irrigation should replace water lost from the root zone, not simply wet the surface.” That idea guides this article. Better coverage begins with observing the spray, measuring output, and checking whether each head reaches its neighbor. Small changes matter. A two-minute test can expose a major overlap problem.
Start with the basics. Clear clogged nozzles. Straighten leaning bodies. Set the spray arc away from walls, paths, and parked vehicles. Then adjust radius, pressure, and run time carefully. Catch cups placed around the lawn can show whether water is distributed evenly. They also reveal a mistake many gardeners miss: longer watering does not repair poor coverage.
The process is practical, but not perfectly predictable. Wind changes the pattern. Water pressure may vary during the day. Soil can absorb water unevenly. Even a carefully adjusted system may need seasonal review. That is not failure; it is useful evidence.
This guide explains how to diagnose those issues and improve performance without overwatering. Expect clear checks, hands-on details, and a few honest limitations. The goal is not a flawless spray pattern. It is healthier coverage with less unnecessary water.
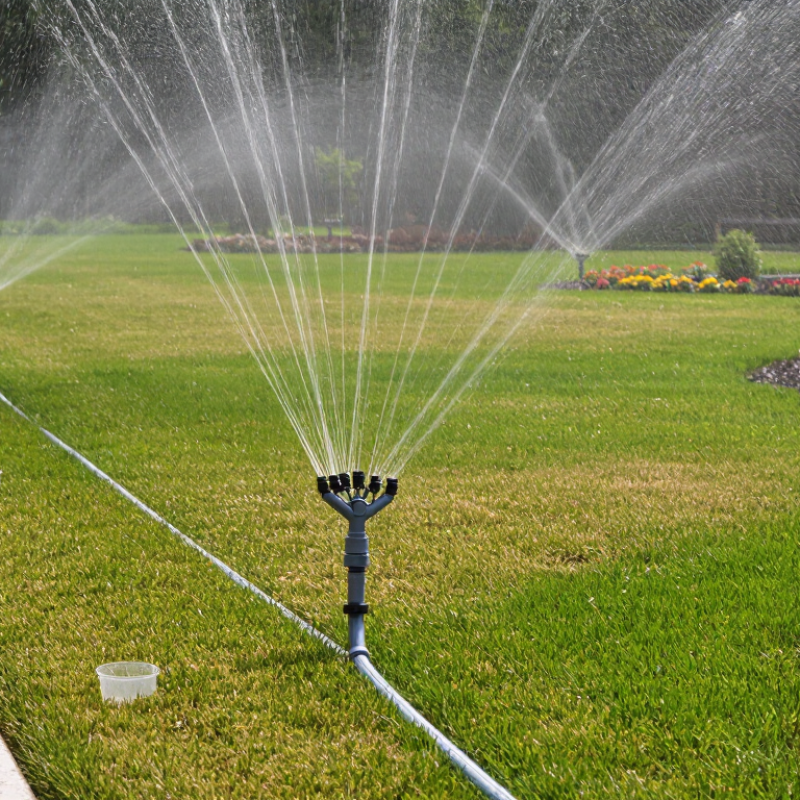
Table of Contents [Hide]
Verify 30 psi Supply Pressure and Level the Pop-Up Body
Before adjusting pop-up sprinklers, verify the supply pressure with a reliable pressure gauge. Check the reading while the irrigation zone is running. The target should be 30 psi at the sprinkler supply. Static pressure can look acceptable, yet pressure may drop when several heads operate together. That difference affects spray distance and uniformity.
Turn off the water before inspecting each pop-up body. Remove surrounding grass, loose soil, and small stones carefully. The body should sit vertically, with its top nearly level with the finished ground. A small mistake matters. Use a short level across the cap, then correct the surrounding soil gradually. Avoid burying the cap, because debris can enter during retraction. I once leveled a head by eye, and the spray still leaned toward the walkway. The second check with a level exposed the problem.
Run the zone again and observe the water pattern from several angles. Adjust the spray direction and arc only after the body is stable. If the spray radius remains short, check for a clogged nozzle, damaged seal, or undersized supply line. Do not increase the opening to compensate for weak pressure. That can create misting and uneven coverage. Watch the soil near the sprinkler, too. Pooling water may indicate excessive flow or compacted ground. Recheck after the first watering cycle, because freshly adjusted soil can settle slightly. Perfect alignment is not always immediate.
How to Adjust Pop Up Sprinklers for Better Coverage? - Verify 30 psi Supply Pressure and Level the Pop-Up Body
| Adjustment Area | What to Check | Recommended Target or Condition | Adjustment Method | How to Verify Better Coverage |
|---|---|---|---|---|
| Supply pressure | Measure pressure while the irrigation zone is operating. | Approximately 30 psi for many pop-up spray applications; confirm the head specification when applicable. | Attach a pressure gauge to an accessible test point or hose-thread connection. Open the zone fully before reading. | The spray pattern should remain stable without misting, weak streams, or intermittent pop-up operation. |
| Low pressure | Pressure below the operating target, especially when several heads run together. | Avoid operating a zone with visibly weak or incomplete spray patterns. | Inspect for clogged nozzles, leaking pipe, excessive zone flow, partially closed valves, or undersized supply piping. Reduce the number of heads per zone if necessary. | Recheck the gauge with the zone running and compare the outer spray radius at each head. |
| High pressure | Pressure substantially above the intended operating range, producing fine mist or fog. | Keep pressure close to the specified operating pressure; avoid persistent misting. | Check whether a pressure regulator is required and inspect valves for correct operation. Do not compensate for excessive pressure by sharply closing a valve. | The stream should form distinct droplets and reach the intended area without drifting heavily in light wind. |
| Pop-up body level | Check whether the body is tilted, buried, or raised above the finished soil level. | The body should be vertical and the top should sit approximately flush with the finished grade. | Remove surrounding soil, reset the fitting, and compact stable soil around the body. Keep the cap clear of mulch and turf buildup. | The riser should rise vertically and the nozzle should spray evenly rather than favoring one side. |
| Nozzle cleanliness | Look for dirt, sand, mineral deposits, or damaged openings. | All nozzle openings should be unobstructed and undamaged. | Shut off the zone, remove the nozzle, rinse it with clean water, and use a soft brush if needed. Replace damaged parts with the correct matching type. | The spray should have a consistent fan or stream with no visible gaps caused by blockage. |
| Arc and radius | Confirm the spray angle and distance match the sprinkler location. | Corner heads generally cover a quarter circle, edge heads a half circle, and interior heads a full circle when the layout requires it. | Adjust the arc and radius using the nozzle’s adjustment mechanism. Avoid reducing the radius so much that nearby areas become dry. | The spray should reach adjacent sprinkler heads or the intended boundary for head-to-head coverage. |
| Head spacing | Compare the distance between heads with the actual spray radius. | Use head-to-head coverage where practical; each head should reach the next head or the defined edge. | Move or add a head if the spacing is too wide for the available pressure and nozzle output. | Walk the zone during operation and mark dry strips between spray patterns. |
| Runoff and soil absorption | Check for puddling, surface flow, or water collecting at low points. | Water should soak in without persistent runoff. | Use shorter cycles with soak periods, clean blocked nozzles, and correct head alignment. Repair leaking connections. | After several minutes, there should be no continuous water flowing onto pavement or pooling around the heads. |
| Final uniformity test | Compare water depth at multiple locations in the irrigated area. | Coverage should be visually even, with no repeated dry zones or excessive wet spots. | Place identical shallow containers across the zone, run the system for a fixed time, and compare the collected water. | Adjust pressure, leveling, nozzle direction, or spacing again if collection amounts vary greatly. |
Safety note: Shut off the water supply before removing a sprinkler head or working on underground connections. Pressure requirements can vary by sprinkler type, nozzle, elevation, and system design.
Brands
Proudly Trusted by Top Suppliers Worldwide







Let us know and we will automate, together to fit your industrial needs.
 +91-97254 16844
Clients
Proudly Trusted by Top Companies Worldwide


Do you need Help? Get in touch.
X
Please fill out the form below and we will get back to you as soon as possible.