o p t i m a r o b o t i c s

Blogs

How to Build Your Own Robot Arm at Home?

Building your own robot arm at home can be an exciting project. It allows you to explore engineering and programming concepts in a hands-on way. With the right materials and tools, you can create an impressive device. Imagine maneuvering your robot arm with precision, or programming it to perform tasks.

When making your robot arm, thinking about the design is key. You may not have access to advanced equipment, but you can use basic items. Cardboard, wood, or even plastic bottle caps can serve as great materials. Don’t be afraid to experiment with different structures. Each attempt can teach you something valuable.

Consider the challenges you might face. The joints may not move as smoothly as expected. Calibration could take time and effort. Reflect on these issues; they are part of the process. Embrace the trial and error, and remember, building "ur robot arm" is about learning and creativity. Your efforts will lead to a unique creation that you can proudly call your own.
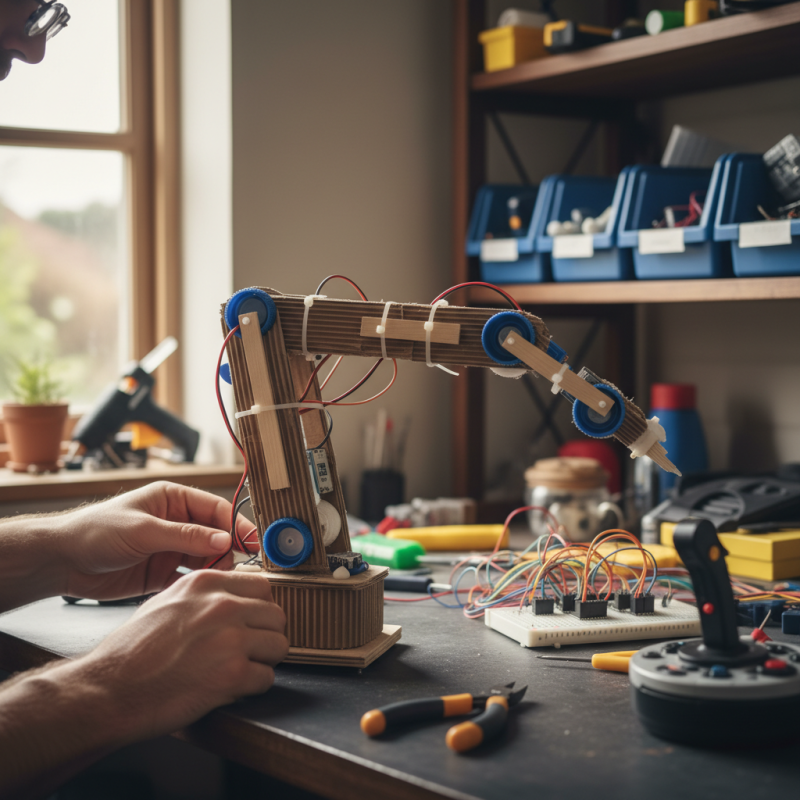
How to Build Your Own Robot Arm at Home?

Understanding the Basics of Robot Arm Design and Functionality

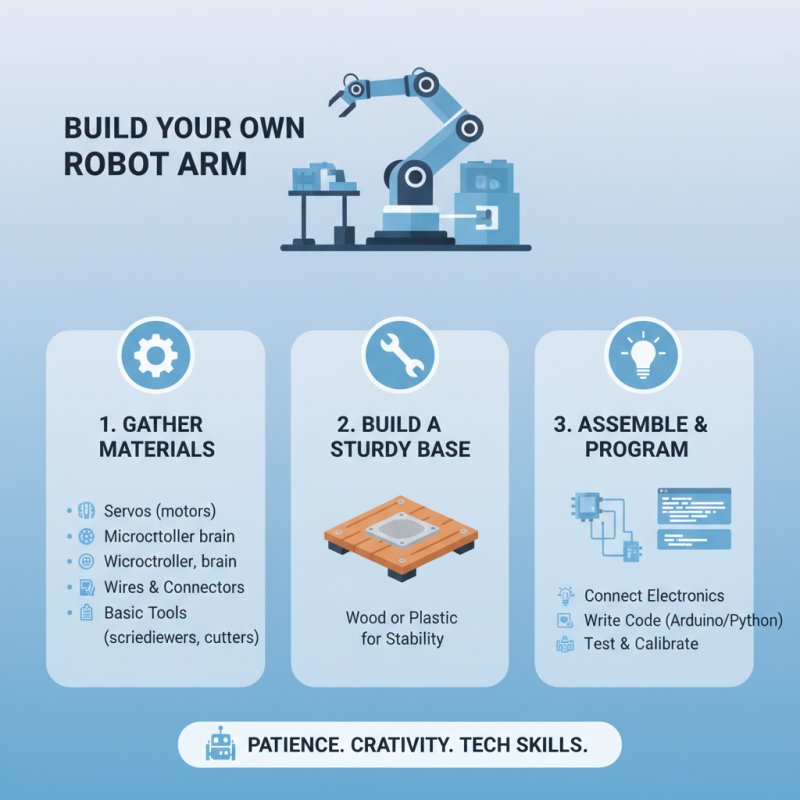
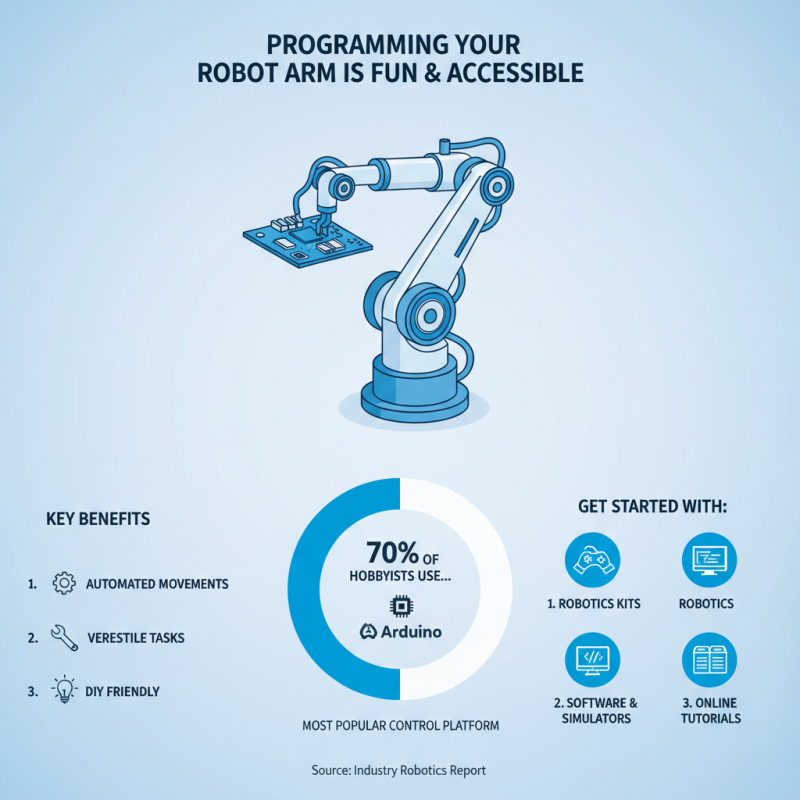
Building a robot arm at home can be a rewarding experience. Understanding the basics of design and functionality is essential. A robot arm mimics human motion through joints and segments. It typically has a series of motors and sensors to control movement. According to recent reports, the robotics market is projected to grow significantly. This growth reflects increased interest and accessibility in robotics for hobbyists.

When starting your design, consider the degrees of freedom your arm will need. A standard configuration may have four to six joints. This allows for versatile movement. Using lightweight materials can enhance performance. However, remember that lighter materials can make the arm less stable. You’ll need to strike a balance between weight and durability.

Tip: Start with simple prototypes. Use cardboard or plastic for trial designs. This allows for easy adjustments. Experimenting with different configurations can help identify what works best. Keep an eye on your motor selection too. Many hobbyists overlook this; a strong enough motor is crucial for proper movement. Reflecting on your early mistakes will guide your iterative design process. Don’t be afraid to experiment, but also keep a journal of what works and what doesn’t.

How to Build Your Own Robot Arm at Home? - Understanding the Basics of Robot Arm Design and Functionality

Component Description Materials Estimated Cost ($)
Microcontroller Main control unit for programming and operation Plastic, Silicon 25
Servomotors Actuators for moving the robot arm Metal, Plastic 60
Chassis Structure to mount components Aluminum, Wood 30
Sensors For detecting position and obstacles Silicon, Plastic 40
Power Supply Source of energy for all components Plastic, Metal 20

Choosing the Right Materials and Tools for Your DIY Robot Arm

When you decide to build your own robot arm, choosing the right materials and tools is crucial. Start with lightweight yet sturdy materials like aluminum or acrylic sheets. These will help ensure the arm is functional yet easy to maneuver. Consider purchasing a few servos or motors. They provide precise control for each joint. Additionally, a microcontroller board can help in programming and controlling movements effectively.

Tips: Check local electronics stores for components. They often offer helpful advice. If you’re on a budget, repurpose items from old toys. This reduces waste and saves money.

Plastic connectors and brackets can be useful for assembling parts. They create a solid structure without excessive weight. Don't forget to get screws and bolts to secure everything well. Sometimes, using the wrong size hardware can lead to instability.

Test each component before final assembly. Ensure that motors can move as expected. You might need to troubleshoot some connections or programming issues. It's natural to face challenges along the way. Learn from every mistake to make improvements. Building a robot arm is an iterative process, and each attempt builds your experience.

Step-by-Step Assembly Process for Building Your Robot Arm

How to Build Your Own Robot Arm at Home?

Building your own robot arm at home can be an exciting project. It requires patience, creativity, and a little bit of technical know-how. Start by gathering your materials. You will need servos, a microcontroller, and some basic tools. A sturdy base is essential. Consider using wood or plastic to provide stability.

Next, focus on assembling the joints. This is where your creativity shines. Use screws and brackets to connect the servos, allowing for smooth movement. Pay close attention to the angles. This is sometimes where things go wrong. An incorrect angle can affect the arm’s ability to reach or pick up objects. Test each joint carefully during assembly.

Wiring comes next, and it's crucial to stay organized. Color-code your wires for easy identification. Connecting the servos to the microcontroller may also require soldering. Take your time; rushing can lead to mistakes. A simple code can help you control your robot arm. However, debugging can be frustrating. Don’t hesitate to revisit previous steps if something doesn’t work right. Each setback brings an opportunity to learn.

Programming Your Robot Arm for Automated Movements

How to Build Your Own Robot Arm at Home?

Programming your robot arm is a fascinating venture. With the right tools, anyone can create automated movements for various tasks. According to a recent industry report, around 70% of hobbyists use Arduino as their control platform. This highlights its popularity in DIY robotics.

Start by choosing a suitable programming language. Many prefer Python due to its simplicity. Others opt for C++ for more advanced control. This choice impacts the arm's responsiveness and accuracy. Keep in mind, though, programming can become complex quickly. Mistakes in your code can lead to unexpected movements. It's crucial to test each segment rigorously.

When coding, consider using libraries tailored for robot arms. These can simplify tasks like inverse kinematics. However, they may not offer the precision needed for every project. Regular adjustments and fine-tuning are often necessary. Remember, creating an automated arm is an iterative process. Your initial design may require tweaks. Embrace this as part of the learning journey. Each mistake holds an opportunity for improvement.

Testing and Troubleshooting Your Home-Built Robot Arm

When testing your home-built robot arm, focus on calibration. Move each joint carefully. Ensure they align with your intended design. If something seems off, double-check the connections. Tighten loose screws and secure all wiring.

Tips: Use a simple app to track movements. This can help visualize errors. Adjust settings based on feedback.

Troubleshooting often reveals unexpected issues. You may find the arm moves too slowly or not at all. Check the motors. Are they receiving power? Sometimes, a broken wire can cause major disruptions. Don't forget to inspect your code. A minor error can prevent proper functioning.

Testing is iterative. Keep notes on each trial. Document what works and what doesn’t. This process will be invaluable for future projects. Embrace the process of learning. It’s okay to stumble!

Robot Arm Performance Analysis

This bar chart represents the performance metrics of a home-built robot arm after various testing phases. The metrics include Accuracy, Speed, and Stability measured during operations.

Brands

Proudly Trusted by Top Suppliers Worldwide

Let us know and we will automate, together to fit your industrial needs.

Clients

Proudly Trusted by Top Companies Worldwide

Do you need Help? Get in touch.

X

Please fill out the form below and we will get back to you as soon as possible.

    Subscribe our newsletter & get updates