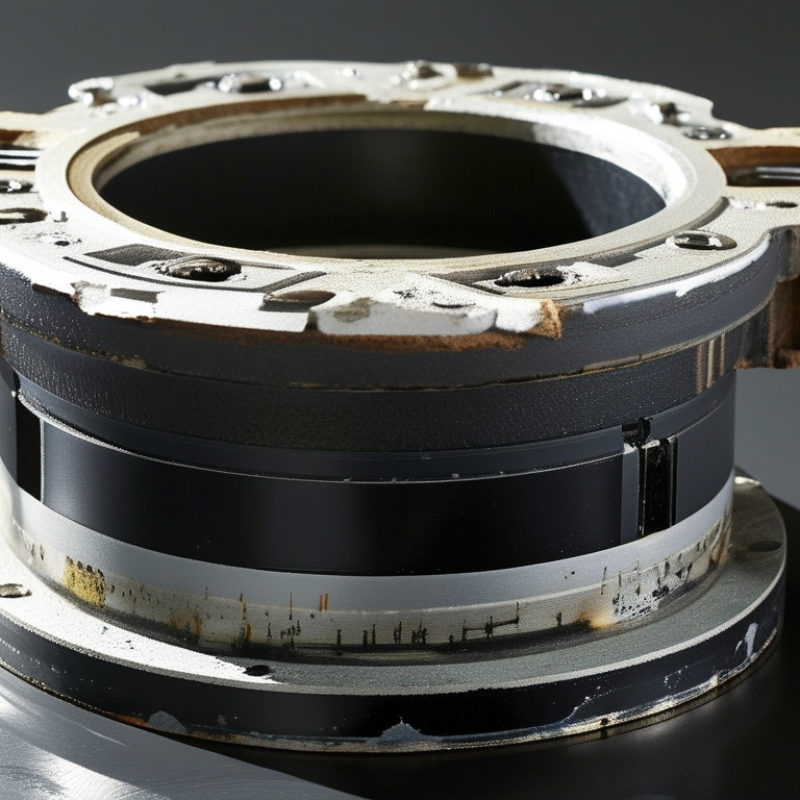
| Overview | Definition | A mechanical seal is a dynamic sealing device fitted around a rotating pump shaft to prevent water or process fluid from leaking along the shaft. | Designed for continuous shaft rotation |
| Primary sealing faces | The rotating and stationary faces run against each other to form the main fluid barrier. | Typical materials include carbon, ceramic, silicon carbide, or tungsten carbide |
| Secondary sealing elements | O-rings, bellows, wedges, or gaskets seal between the faces and the shaft or rotating assembly. | Elastomer selection must match fluid and temperature |
| Main purpose | Reduces leakage, protects bearings and motor components, and helps maintain pump efficiency. | A small initial film of water may lubricate the seal faces |
| Common applications | Used in centrifugal, circulation, booster, irrigation, HVAC, and general water-service pumps. | Selection depends on pump design and operating conditions |
| Construction | Rotating seal face | Rotates with the shaft and contacts the stationary face. | Must remain flat, clean, and free from scratches |
| Stationary seal seat | Remains fixed in the pump housing and provides the mating surface for the rotating face. | Installed squarely in the seal chamber |
| Spring or bellows | Maintains contact pressure between the primary sealing faces as components move or wear. | Must not be blocked by scale, dirt, or corrosion |
| Gland or retainer | Holds the stationary components in position and helps maintain correct axial alignment. | Fasteners should be tightened evenly |
| Shaft sleeve | Protects the pump shaft from wear and provides a suitable surface for the seal’s secondary element. | Inspect for grooves, pitting, and corrosion |
| Elastomer | Provides flexible sealing around the shaft and between stationary components. | Common choices include EPDM, NBR, FKM, and PTFE-based elements |
| Installation | Safety isolation | Stop the pump, isolate electrical power, close valves, relieve pressure, and drain the casing before work begins. | Lockout and tagout required |
| Component verification | Confirm shaft diameter, seal chamber dimensions, working length, rotation direction, pressure, temperature, and fluid compatibility. | Never select a seal by appearance alone |
| Cleaning | Clean the shaft, sleeve, seal chamber, and mating surfaces with a lint-free cloth. | Remove rust, scale, old gasket material, and debris |
| Face handling | Do not touch polished sealing faces with bare fingers or place them face-down on dirty surfaces. | Use clean gloves and protect faces from impact |
| Lubrication | Lightly lubricate compatible elastomers during assembly. Do not use a lubricant that attacks the rubber or contaminates the pumped fluid. | Use clean water or a compatible assembly lubricant when permitted |
| Alignment and tightening | Install components squarely and tighten gland or housing fasteners in a gradual, crosswise pattern. | Avoid cocking, uneven compression, and excessive torque |
| Pre-start check | Rotate the shaft by hand when safe, refill and vent the pump, and verify that the seal is wetted before starting. | Never run a standard water seal dry |
| Operating Parameters | Pressure | The seal must be rated for the actual pressure at the seal chamber, including pressure changes during operation. | Use the seal’s published pressure rating |
| Temperature | Temperature affects elastomer life, face distortion, lubrication, and fluid viscosity. | Remain within the selected material’s temperature range |
| Shaft speed | Higher speed increases heat generation at the sealing faces and may require a different seal design. | Match the seal to pump revolutions per minute |
| Fluid quality | Sand, rust, scale, suspended solids, and crystallized chemicals can abrade or damage sealing faces. | Use filtration or flushing where necessary |
| Shaft runout | Excessive shaft movement prevents stable contact between the seal faces. | Check shaft condition and alignment if leakage persists |
| Dry-running tolerance | Most water-pump mechanical seals depend on liquid for cooling and lubrication. | Avoid dry running, even for short periods |
| Maintenance | Routine visual inspection | Inspect for visible leakage, spray, deposits, corrosion, abnormal noise, and overheating. | Check during scheduled pump rounds |
| Leakage monitoring | A stable, very small moisture film may occur during bedding-in, but increasing or continuous leakage requires investigation. | Record leakage trend rather than relying on a single observation |
| Pump alignment | Check coupling alignment, shaft condition, bearing condition, and vibration when seal life is unusually short. | Correct mechanical causes before installing another seal |
| Flush or cooling system | Where fitted, keep flush lines open and free from blockage, and verify adequate flow. | Follow the pump maintenance schedule |
| Spare-parts storage | Store seals in a cool, dry, clean location away from sunlight, ozone sources, oils, and sharp objects. | Keep elastomers sealed and protected from deformation |
| Failure Causes | Dry running | Insufficient liquid causes rapid face overheating, cracking, blistering, or carbon damage. | Verify priming, liquid level, and suction conditions |
| Contaminated fluid | Abrasive particles can score the faces and wear the elastomers. | Improve filtration or use abrasion-resistant materials |
| Incorrect installation | Scratched faces, reversed components, damaged O-rings, or incorrect working length can cause immediate leakage. | Use clean tools and verify assembly orientation |
| Shaft misalignment | Misalignment or excessive runout causes uneven face loading and accelerated wear. | Inspect coupling, bearings, shaft, and housing |
| Excessive vibration | Cavitation, imbalance, worn bearings, or a bent shaft can disturb the sealing interface. | Resolve the vibration source before replacement |
| Chemical incompatibility | The pumped liquid may swell, harden, crack, or soften the elastomer. | Select materials based on actual fluid chemistry and concentration |
| Thermal damage | High temperature can distort faces, degrade elastomers, and reduce the liquid film between faces. | Check operating temperature and cooling arrangements |
| Corrosion or scaling | Deposits can prevent spring movement and damage contact surfaces. | Clean the chamber and assess material compatibility |
| Replacement Guidelines | Replacement indicators | Replace the seal when leakage increases, faces are visibly damaged, elastomers are hardened, or the spring mechanism is corroded or seized. | Replace before leakage threatens bearings or electrical parts |
| Seal identification | Measure shaft or sleeve diameter and record the original seal dimensions and material codes where available. | Critical dimensions include diameter, working length, and seat size |
| Material selection | Choose face and elastomer materials for the fluid, temperature, pressure, speed, and presence of solids. | Do not substitute materials without technical verification |
| Related inspections | Inspect the shaft, sleeve, bearings, coupling, seal chamber, gasket surfaces, and impeller while the pump is open. | Repair damaged components before fitting the new seal |
| Post-replacement test | Prime and vent the pump, check rotation, start under normal conditions, and monitor leakage, temperature, pressure, and vibration. | Observe closely during the first operating cycle |
| Documentation | Record seal dimensions, materials, installation date, operating conditions, failure mode, and corrective action. | Use records to improve future seal selection and maintenance intervals |
| Troubleshooting | Leakage immediately after installation | Possible causes include damaged faces, incorrect orientation, contaminated surfaces, wrong setting length, or a damaged elastomer. | Stop and inspect rather than repeatedly tightening components |
| Leakage after several operating hours | Possible causes include dry running, solids in the fluid, thermal distortion, vibration, or incompatible materials. | Review actual operating conditions against seal limits |
| Seal overheating | Possible causes include insufficient liquid, excessive pressure, excessive speed, blocked flush flow, or face contact without lubrication. | Verify priming, cooling, pressure, and rotation conditions |
| Repeated short seal life | Repeated failures usually indicate an unresolved system problem rather than an isolated seal defect. | Perform root-cause analysis before selecting another replacement |